Language/React.js
[React] 감정일기장 프로젝트 : DiaryPage 구현하기
JJcoding
2024. 10. 29. 11:03
Diary Page 구현하기
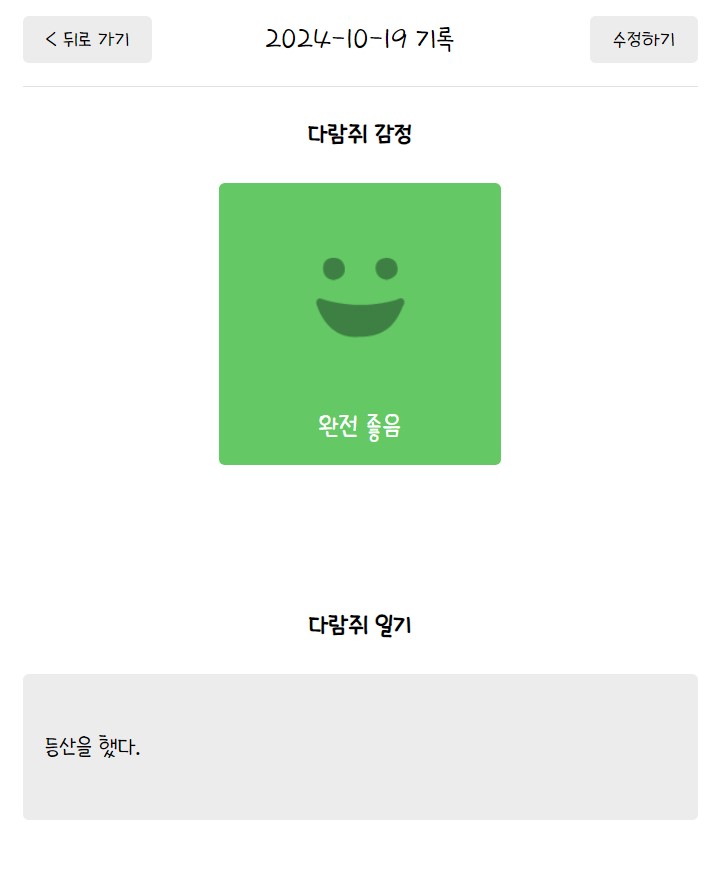
- 상세보기 페이지
- 컴포넌트 구조는
- Header 컴포넌트
- Viewer 컴포넌트
Diary.jsx
import { useParams, useNavigate } from "react-router-dom";
import Header from "../components/Header";
import Button from "../components/Button";
import Viewer from "../components/Viewer";
import useDiary from "../hooks/useDiary";
import { getStringedDate } from "../utill/get-stringed-date";

const Diary = () => {
  const params = useParams();
  const nav = useNavigate();

  const curDiaryItem = useDiary(params.id);
  //console.log(curDiaryItem);
  if (!curDiaryItem) {
    return <div>데이터 로딩중입니다람쥐...</div>;
  }

  const { createdDate, emotionId, content } = curDiaryItem;
  const title = getStringedDate(new Date(createdDate));

  return (
    <div>
      <Header
        title={`${title} 기록`}
        leftChild={<Button onClick={() => nav(-1)} text={"< 뒤로 가기"} />}
        rightChild={
          <Button onClick={() => nav(`/edit/${params.id}`)} text={"수정하기"} />
        }
      />
      <Viewer emotionId={emotionId} content={content} />
    </div>
  );
};

export default Diary;
- Editor와 공통으로 사용하는 기능을 getStringedDate 함수로 뽑아내서 함께 사용하였다.
- Edit와 공통으로 사용하는 기능을 useDiary 라는 사용자 정의 훅으로 만들어서 함께 사용하였다.
get-stringed-date.js
export const getStringedDate = (targetDate) => {
  // 날짜 -> YYYY.MM.DD
  let year = targetDate.getFullYear();
  let month = targetDate.getMonth() + 1;
  let date = targetDate.getDate();

  if (month < 10) {
    month = `0${month}`;
  }
  if (date < 10) {
    date = `0${date}`;
  }
  return `${year}-${month}-${date}`;
};
- 날짜 포맷을 YYYY-MM-DD로 만드는 기능
useDiary.jsx
import { useContext, useState, useEffect } from "react";
import { DiaryStateContext } from "../App";
import { useNavigate } from "react-router-dom";

const useDiary = (id) => {
  const data = useContext(DiaryStateContext);
  const [curDiaryItem, setCurDiaryItem] = useState();
  const nav = useNavigate();

  useEffect(() => {
    const currentDiaryItem = data.find(
      (item) => String(item.id) === String(id)
    );

    if (!currentDiaryItem) {
      window.alert("존재하지 않는 일기입니다람쥐");
      nav("/", { replace: true });
    }

    setCurDiaryItem(currentDiaryItem);
  }, [id, data]);

  return curDiaryItem;
};

export default useDiary;
- useState, useEffect 등 리액트 훅을 사용하는 기능이기 때문에 일반 함수로는 뽑아낼 수 없고 사용자 정의 훅으로 뽑아내었다.
Viewer.jsx
import "./Viewer.css";
import { getEmotionImage } from "../utill/get-emotion-image";
import { emotionList } from "../utill/constants";

const Viewer = ({ emotionId, content }) => {
  const emotionItem = emotionList.find(
    (item) => String(item.emotionId) === String(emotionId)
  );

  return (
    <div className="Viewer">
      <section className="img_section">
        <h4>다람쥐 감정</h4>
        <div className={`emotion_img_wrapper emotion_img_wrapper_${emotionId}`}>
          <img src={getEmotionImage(emotionId)} />
          <div>{emotionItem.emotionName}</div>
        </div>
      </section>
      <section className="content_section">
        <h4>다람쥐 일기</h4>
        <div className="content_wrapper">
          <p>{content}</p>
        </div>
      </section>
    </div>
  );
};

export default Viewer;
- Editor와 공통으로 사용하는 객체를 emotionList 함수로 뽑아내어 함께 사용하였다.
constants.js
export const emotionList = [
  {
    emotionId: 1,
    emotionName: "완전 좋음",
  },
  {
    emotionId: 2,
    emotionName: "좋음",
  },
  {
    emotionId: 3,
    emotionName: "그럭저럭",
  },
  {
    emotionId: 4,
    emotionName: "나쁨",
  },
  {
    emotionId: 5,
    emotionName: "끔찍함",
  },
];
- 이모션 Id 와 이모션 Name을 묶어준 배열 객체
- 완성
출처 : 한입 크기로 잘라먹는 리액트